 Did you know that San Mateo County Libraries has a total of seventeen 3D printers available for you to print your designs for free?
First launched in 2017 to help bridge the technology gap, SMCL staff are currently utilizing our 3D printers to create PPE (Personal Protective Equipment) such as face shields to help support our communities. As we continue to evaluate and adjust our operations due to the ongoing COVID-19 pandemic, the closure of our library locations has unfortunately prevented us from making our 3D printers available for your use. Although our 3D printers are not available right now, it is still a perfect time to engage with new technologies by learning how you can bring your designs to life with a 3D Modeling or CAD program!
What is CAD?
CAD—short for Computer-Aided Design—is a software or program that allows you to model 2D and 3D objects in a virtual environment. One such example is Tinkercad, opens a new window.
Besides having access to the internet, the only thing you need to use the Tinkercad software is to create an account, opens a new window. Tinkercad has the added benefit of being free, browser-based, and easy to use; you don’t have to pay for it, download it, or exhaust yourself trying to learn how to use it!
Project Inspirations
3D printing is an endlessly applicable technology with seemingly unlimited uses and possibilities. Here are some projects made using Tinkercad that may inspire you!
- Planter bowl, opens a new window
- Bonsai planter pot, opens a new window
- Replacement clip for a keyboard, opens a new window
- Whistle, opens a new window
Not all projects require a use, of course, and it’s just as fun to create something that is aesthetically pleasing or that brings you joy. Personally, I have been inspired by recent video game releases to create the following decorative projects using Tinkercad:
- Bell bag from the game series Animal Crossing , opens a new window
- Fossil rock from the game series Animal Crossing, opens a new window
- Green plumbob from the game series The Sims , opens a new window
How Do You Use Tinkercad?
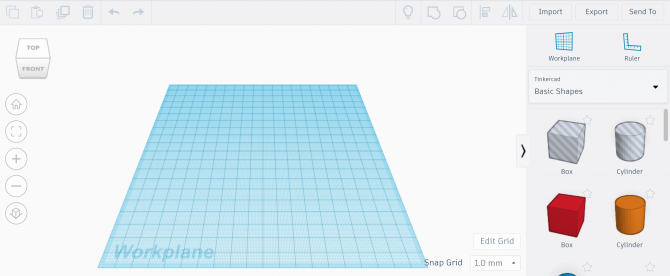
After opening Tinkercad in the browser of your choice and creating your account, you can create a new project to enter into the Workplane. This will display itself as a plane or grid wherein you drag shapes from its library and manipulate them within the virtual environment. You can join multiple shapes together to create new shapes, as well as resize and transform existing shapes by clicking and dragging, or by typing in numbers for specific dimensions. From there, you can let your imagination run wild!
Let's Make a Button Together!
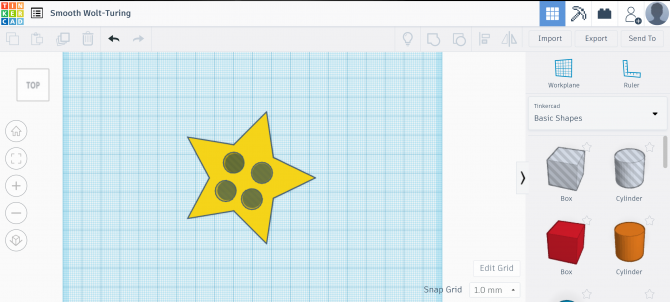
Let’s challenge ourselves to create a button by first picking a base shape, such as a circle or a star, and then adding four holes into our design. To do this, I will first log into my account and access my dashboard, where I click on the “Create New Design” button. This will take me to the Workplane, where I can begin creating my design.
There are lots of options to play with, so for making a button, let’s focus on the following for now:
- Resizing solid objects
- Creating holes or empty spaces in a solid object
- Grouping shapes together to create a new object
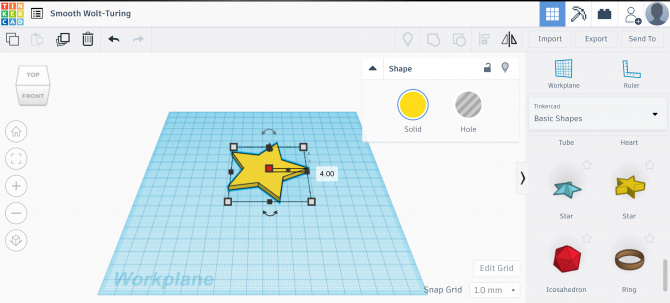
I have chosen to make a star button, so I will click and drag the 3D star shape from the library onto my grid. From there, I can resize my star to the desired thickness and size by clicking and dragging the upper-middle and lower-middle points of the shape.
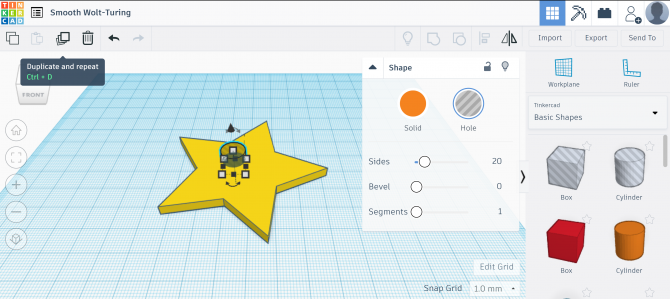
Next, we want to create empty circles within the star so that our button has holes to sew through. This is done by using an empty shape, or a hole, which are the shapes in the library that feature a striped pattern, indicating they will remove a space rather than add a solid object. I chose a striped cylinder to create the holes and dragged it from the library to my plane. I then resized the shape of the cylinder to fit within the star, making sure it was tall enough to go through both ends.
We will need four holes, so to save some time, I can select the cylinder and click the “Duplicate and Repeat” button to copy the shape and drag each to the correct position. Once everything is where I want it to be, I can hold down the Shift key and click on my shapes to select them all at once. Finally, I will press the “Group” button on the right side of the top menu to join them together as one shape. And here is the final result, opens a new window!
Once your design is complete, we welcome you to bring your project to life at your local branch when we reopen – we love seeing what our patrons are up to!
Let us know what you plan to design in the comments below!


Add a comment to: Explore 3D Modeling with Tinkercad